HIMAX Portrait Enclosed Unit 15217
Available versions:
HIMAX -/B – Basic version
HIMAX -/Pro – Pro version, with screen
HIMAX -/SO – Special order version with “Autovent” pressure reduction control for hydro test applications. Click here for operating instructions
HIMAX -SO – Special order version with full hydrostatic test application for pressure increase and pressure reduction at user specified ramp rates. Operating instructions soon.
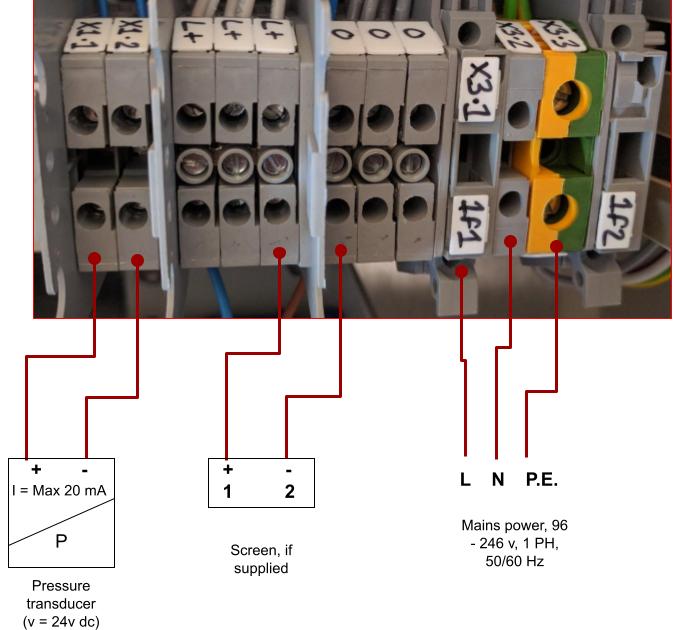
Installation information
See connection drawings below for connection details
- Mount valve
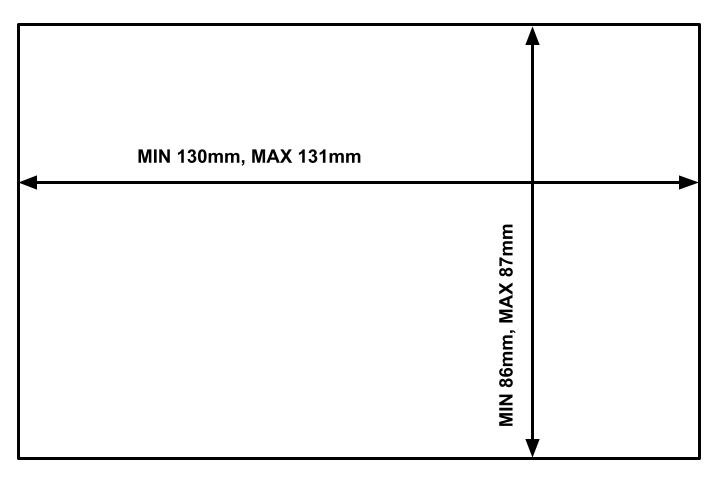
- Mount screen (if supplied, and not already fitted in cabinet). See screen cut out drawing at the bottom of this page.
- Connect pipework. Ensure that there is no stress on the valve connections, as this could cause the valve to become misaligned and stop working.
- Connect mains power
- Connect screen (if supplied and not already fitted in cabinet). The screen requires power (see drawing below) and ethernet (CAT 5) cable. connect one end of the Ethernet cable to the Himax Ethernet connection and the other end to the screen. It does not matter which ethernet connection on the screen is used.
- Connect pressure transducer (if required)
- Connect I/P converter (if required)